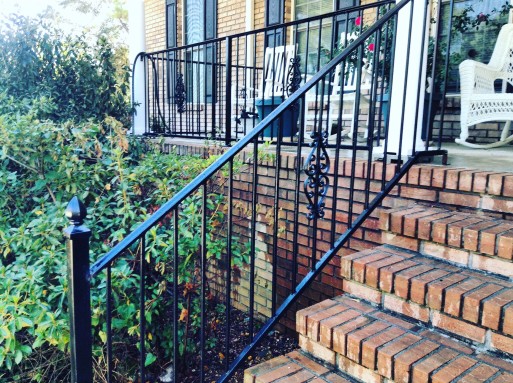
There was a time where people were tearing out old wrought iron railings and replacing them with a more modern look, however, wrought iron is becoming one of the more desirable trends in the housing market currently. From intricate designs to classic iron poles, wrought iron is becoming a statement piece homeowners are looking for.
Purchasing Wrought Iron Railing
While purchasing an iron railing and installing it is always an option, oftentimes many homes still have the original wrought iron railings intact. In this scenario, you don’t need to purchase new railings, even if the current railings don’t look their best. Iron-based metals will always end up rusting and corroding if not cared for properly, so once you’ve refinished your railings, be sure to keep up on regular cleanings.
To maintain your railings, try cleaning them regularly, once a month is suggested in order to avoid any unwanted damage or rust. To clean your railings follow these simple steps:
- Step One: Dust the railings as best as you can
- Step Two: Mix water and dish soap and wipe/scrub all surfaces until a light bubble appears
- Step Three: Rise bubbles completely from railing and either dry with a towel, or let air dry. If there is a design that will hold standing water, be sure to dry these areas as air drying could cause premature rusting issues.
If you are wanting to touch up your railings with either a new coat of black paint, or even make your railings more of a statement piece by adding a pop of color, you will want to be sure you clean and prep your railings prior to painting. If your railings are rusted or chipped in specific areas, be sure to spend extra time prepping and cleaning. To paint your railings follow these prep steps:
- Step One: Scrape off all paint chips that are loose and flaking.
- Step Two: Use a wire brush to remove remaining peeling paint from all surfaces including any intricate design features, spend extra time on rusted areas.
- Step Three: Use heavy grit sandpaper to give one last hard scuff to the railings spending extra time on any remaining rust or damaged surfaces.
- Step Four: Follow the General Cleaning steps to finish your prep work. Be sure you sweep up any paint or dust that has settled from your prep work before moving on to paint!
Related: Preparing Your Home Before the Painters Come
 Now that your railings are clean and prepped, make sure to move onto the painting process as soon as possible so that your railings aren’t left exposed longer than necessary. Start with a rust-proofing primer and then finish your painting with a minimum of two coats of enamel paint, the more durable the better, be sure to look into all the options available to you!
If needed, always err on the side of caution and do multiple thin coats as lighter coats will give off a better-finished look than one heavy coat. Another option would be to use spray paint, this is especially popular when your iron has a lot of intricate details. Allow your paint to dry fully before using the railings or doing any additional cleaning or vacuuming in the area as any dust from cleaning could cling to the wet paint and ruin your work.
Read More: Home Improvement Ideas for Summer
Now that you have beautifully finished new railings, all that’s left to do is enjoy your new statement piece! For more tips and tricks on home improvement projects, or to set up a consultation for your next project, contact us at any time!
Related: Consider a Custom Deck to Increase Your Home’s Value